If you’re approaching a kitchen or bathroom remodel, there’s a pretty high chance you’ll be working with tile: The past few years have seen a huge resurgence in tile backsplash, flooring, feature walls, and shower systems. Unfortunately, tile is also a very niche skill, and the quality of your installation depends heavily on the experience and skill of your installer. In this guide, we’re going to run through a few of the telltale signs of bad tile installation, and detail what can be done to fix or mitigate any unsightly or failed installs. If you’re gearing up for a large remodel, it’s important to have the skills, knowledge, and oversight to identify these issues before they become permanent parts of your home.
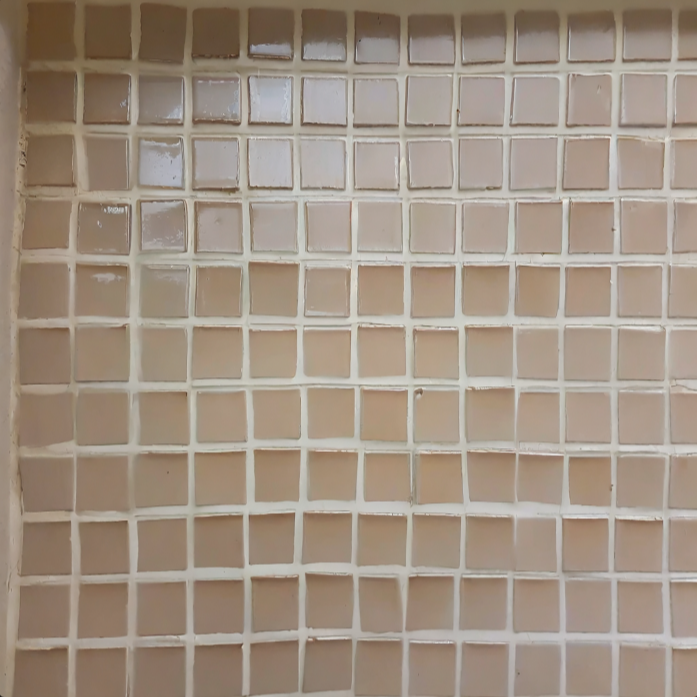
Crooked Tiles
Crooked tiles in a tile installation often result from . Meticulous planning with accurate measurements and layout tools, thorough substrate preparation, the use of high-quality tools, hiring experienced installers, implementing rigorous quality control, and selecting uniform tiles can collectively mitigate these issues. Attention to these factors ensures a precise and visually pleasing tile installation, minimizing the risk of crooked tiles and contributing to the overall success of the project.
To fix crooked tiles, carefully remove surrounding grout and loosen the adhesive beneath the misaligned tiles. Reposition the tiles with precision, ensuring alignment with adjacent ones using a straight edge. Apply fresh adhesive, press the tiles into place, and clean off excess adhesive. Allow the adhesive to set before regrouting and, if desired, sealing the grout. Conduct a final inspection to confirm alignment, and wipe the tiles clean for a polished finish. Precision and patience are crucial, and for extensive misalignments, consulting a professional installer is recommended for optimal results.
Lipping
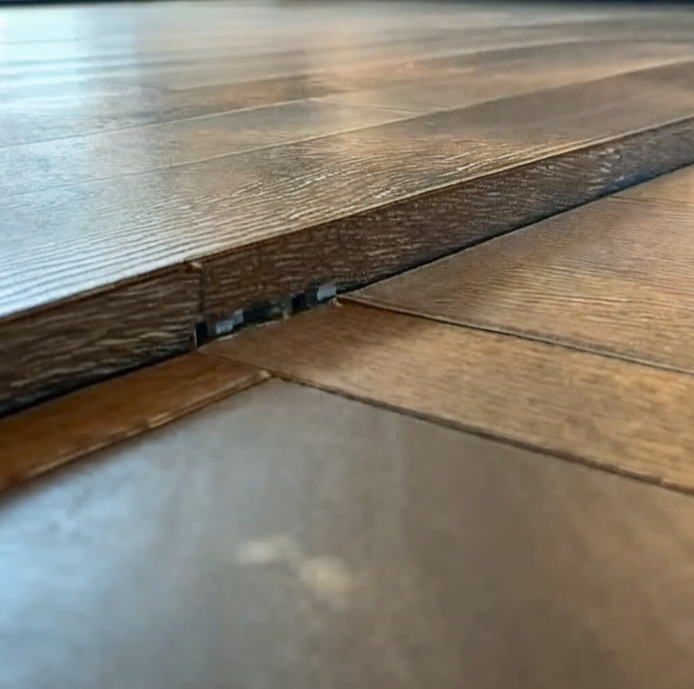
Lipping occurs when the edges of adjacent tiles are not on the same level, creating an uneven surface. While lipping is not as cosmetically noticeable as crooked and uneven tiles, lipping can create sharp edges that are potential cut and fall hazards, especially on tile floors and shower installations.
Lipping is often caused by a few different factors: Inadequate substrate leveling during the preparation phase can contribute to lipping, as can variations in tile thickness or inconsistent application of adhesive. Additionally, improper installation techniques and the use of large-format tiles without proper leveling systems can exacerbate this issue.
In addition to aesthetic concerns, lipping may pose practical issues, especially in high-traffic areas, where uneven tiles can lead to an increased risk of tripping or damage to the tiles’ edges.
Identifying lipping involves visually inspecting the edges of adjacent tiles to detect variations in height. Run your fingers gently across the surface to feel for any noticeable differences. Rectifying lipping involves careful leveling of the tiles. This can be achieved by during the preparation phase to ensure a flat and even surface. Additionally, using during installation can help maintain consistent tile height. If lipping is already present. It’s essential to address lipping during the installation process to achieve a visually harmonious and safe tiled surface.
Excess Grout + Grout Haze
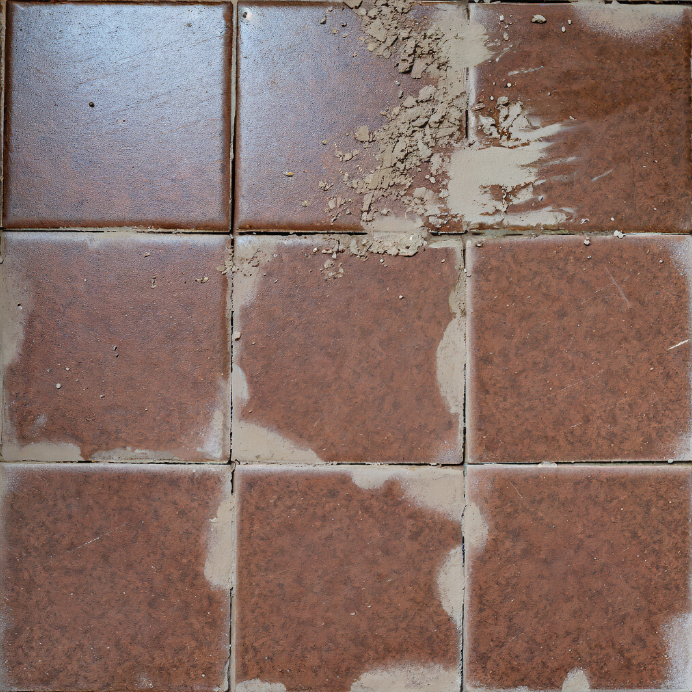
Excessive grout can cheapen the appearance of your tile work and cause a haze across your tiles if incorrectly installed or insufficiently cleaned.
Reasons for Excessive Grout: The presence of too much grout in tile installations can be attributed to a few factors: Inexperienced installers may apply excessive grout due to a lack of precision during the grouting process. Inadequate training or improper mixing of grout compounds can also lead to an overapplication. Additionally, the choice of larger grout line spacers than necessary and inconsistency in spacing can contribute to an excess of grout.
Impact on Aesthetics: Excessive grout can have a pronounced impact on the overall aesthetics of a tiled surface. Rather than serving as a subtle complement to the tiles, too much grout becomes a dominating visual element. This can disrupt the intended pattern or design, making the individual tiles appear smaller and the overall surface less cohesive. The result is often a visually busy and distracting effect that diminishes the sleek, seamless look that well-installed tiles can achieve.
Striking the Right Balance: Achieving the right balance of grout is essential for a polished and visually appealing tile installation. The key lies in careful planning and meticulous application. Choosing an appropriate grout line spacer size, ensuring uniform spacing between tiles, and applying grout with precision contribute to a balanced look. Using contrasting grout colors can enhance the visual impact of the tiles while minimizing the prominence of the grout lines. Professional tile installers are adept at striking this delicate balance, creating a finished product that not only looks polished but also enhances the overall aesthetic of the tiled surface.
Cracked or Chipped Tiles
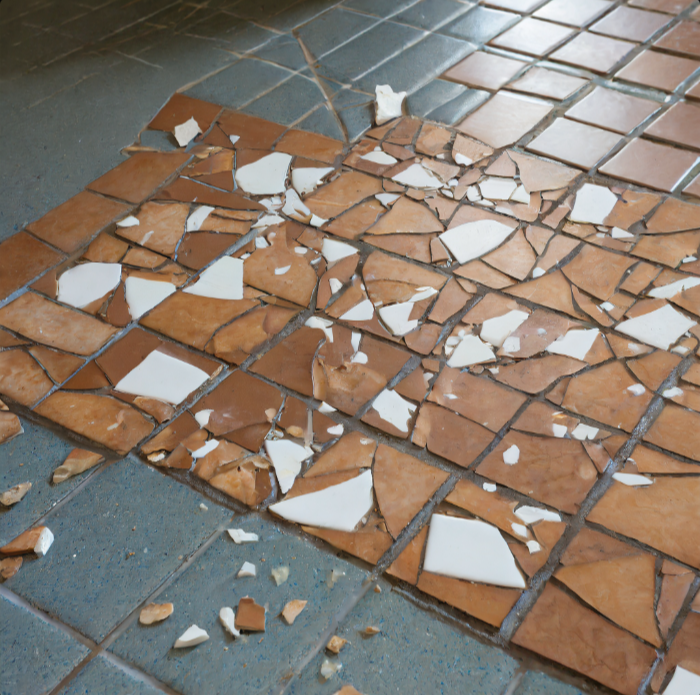
Perhaps the most visibly glaring mistake when installing tile is using damaged, chipped, or broken tiles. These are particularly common around the edges of an installation, such as where a tiled shower meets a non-tiled surface, or where a tile floor meets a threshold.
Causes: Cracked or chipped tiles can result from various causes during the installation process. Substrate issues, such as an uneven or inadequately prepared surface, may lead to stress on the tiles, causing them to crack. Additionally, improper cutting techniques or mishandling during the installation can result in chipped edges. The use of incorrect adhesives or an insufficient amount of adhesive beneath the tiles can also contribute to tile breakage.
Visual Impact: Beyond the obvious aesthetic drawbacks, cracked or chipped tiles pose several implications. Functionally, they compromise the integrity of the surface, creating areas prone to moisture penetration and potential further damage. In areas of foot traffic, cracked or chipped tiles pose safety hazards, as they can lead to slips, trips, or injuries. Furthermore, damaged tiles disrupt the visual cohesiveness of the overall design, detracting from the intended aesthetic appeal of the tiled space.
Repair and Mitigation: Addressing cracked or chipped tiles involves careful repair and mitigation strategies. If the damage is minimal, individual tiles can be replaced by carefully removing the damaged tile, applying new adhesive, and setting a replacement in its place. For larger areas of damage, a more extensive approach may be needed, involving the removal and replacement of a section of tiles. Preventive measures include thorough substrate preparation, ensuring proper cutting techniques, and using the appropriate adhesives. Employing experienced and skilled tile installers who adhere to industry best practices is crucial in mitigating the risk of cracked or chipped tiles and maintaining the longevity and aesthetic integrity of the tiled surface.
Tile FAQs
Tile installation generally costs between $10-$20 per square foot, not including the cost of materials. Tiles themselves range between $5-$50 depending on material, style, and manufacturer. After additional costs like tools, spacers, and adhesive, most tile installs cost about $20-$70 per square foot.
Consider factors such as tile size, thickness, and material. Additionally, consulting with a professional can help you choose tiles suitable for your specific project and minimize potential issues.
Fixing cracked or chipped tiles may require careful removal and replacement. It’s recommended to consult with a professional installer for larger repairs to ensure a seamless result.
Common signs include crooked tiles, uneven tile spacing, visible lippage, cracked or chipped tiles, and excessive grout. These issues can impact both aesthetics and functionality.
Excessive grout can be addressed by carefully removing the excess and reapplying the grout to achieve a more balanced look.
Yes, some uneven tiles can be fixed through leveling techniques without the need for a complete replacement. In cases where slight unevenness is present, grinding or sanding the edges of the tiles can be effective. This method requires careful precision to avoid damaging the tiles but can provide a quick solution for minor lipping issues.


